

HDR Grading
②Create LOOKs for HDR
Firstly, prepare as the instruction of "1. On-set viewing for HDR shooting".
Next recommendation is to prepare the proper image for wave form analysis. If you are using IS-miniX, you can capture or show live image. Select "Wave Form" for the Graph.
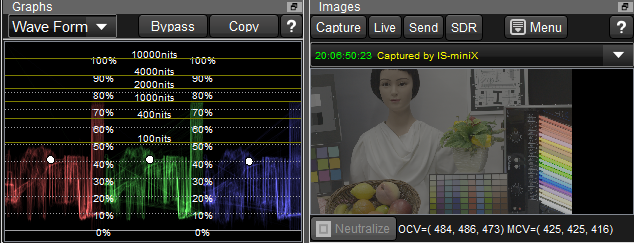
Confirm the Wave Form graph is HDR mode. This example is for PQ curve so 100% is quivalent to 10,000nits.
Image are also processed for HDR target. The image seems dull and we can not tell how the exposure level is or color reproduction is.
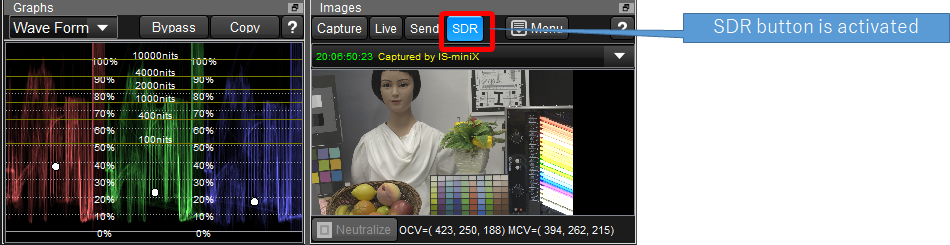
WonderLookPro provides simple method to confirm image and graph on PC screen, "SDR Gamma View" function.
By selecting SDR button, HDR target gamma is converted to SDR 2.4 and the image and graphs are updated by this conversion.
It helps to confirm exposure level roughly. It won't send LUTs to IS-mini. Just only for screen display.
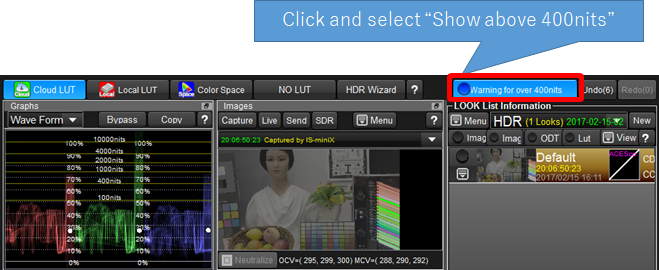
Next explanation is warning function. Click "Warning" button and select "Show above 400nits".
It will mark 400nits or brighter pixels by green color. It will affect to IS-mini's output to confirm the result by monitors.
Following example shows marking on part of the fluorescent light which has over 400nits brightness.
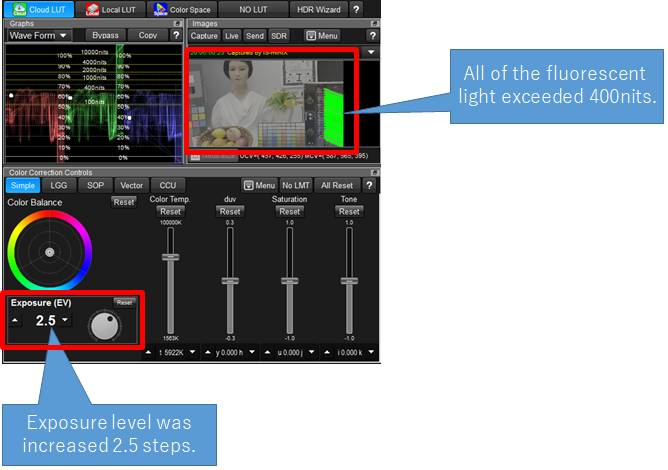
Here is the simple experiment.
Adjust exposure shift parameter on Simple Color Correction to +2.5EV. It is equivalent to open lens iris for 2.5 steps.
Almost all of the fluorescent lights changed to green and we can easily recognize that these are above 400nits.
以上の機能を活用しながらHDR向け映像の色調整を行うことができます。
Other HDR Explanation's links are here.
1. On-set viewing for HDR shooting
3. Simultaneous creation of HDR and SDR contents (including live broadcasting)
4. Convert HDR contents to SDR and use it for SDR contents
5. Convert SDR contents to HDR color space and use it with other HDR contents
6. Calibrate the bright monitor as HDR monitor