

How to match color on DaVinci1
How to match with DaVinci output(SONY F-55 case)
Here explains how to reproduce the color on DaVinci, which was captured by SONY F-55 and created Look by WLP on set.
Firstly, Export Luts by WonderLookPro
Firstly, please export LUTs in DaVinci .cube format by WonderLookPro's export function. The link to the page to explain export function is this.

This time, we will just reproduce the look made on set, we should select "User Output Setting in the Look". If you change the output monitor parameters, you can select "Use Custom Output Setting". Please click "Export" button to do export. You might found "Export Complete Set" button. It can create input/output/look LUTs for more flexible workflow. This time we will use simple combined LUT so please click "Export" button.
Setting on DaVinci
To match colors on DaVinci and shooting on-set, you have to make proper setting regarding scaling on DaVinci. More specifically,
1.
2.
are the items you MUST confirm and set.
Adding to that,
3.
4.
are the items you should confirm and set.
Data Level of ingested media
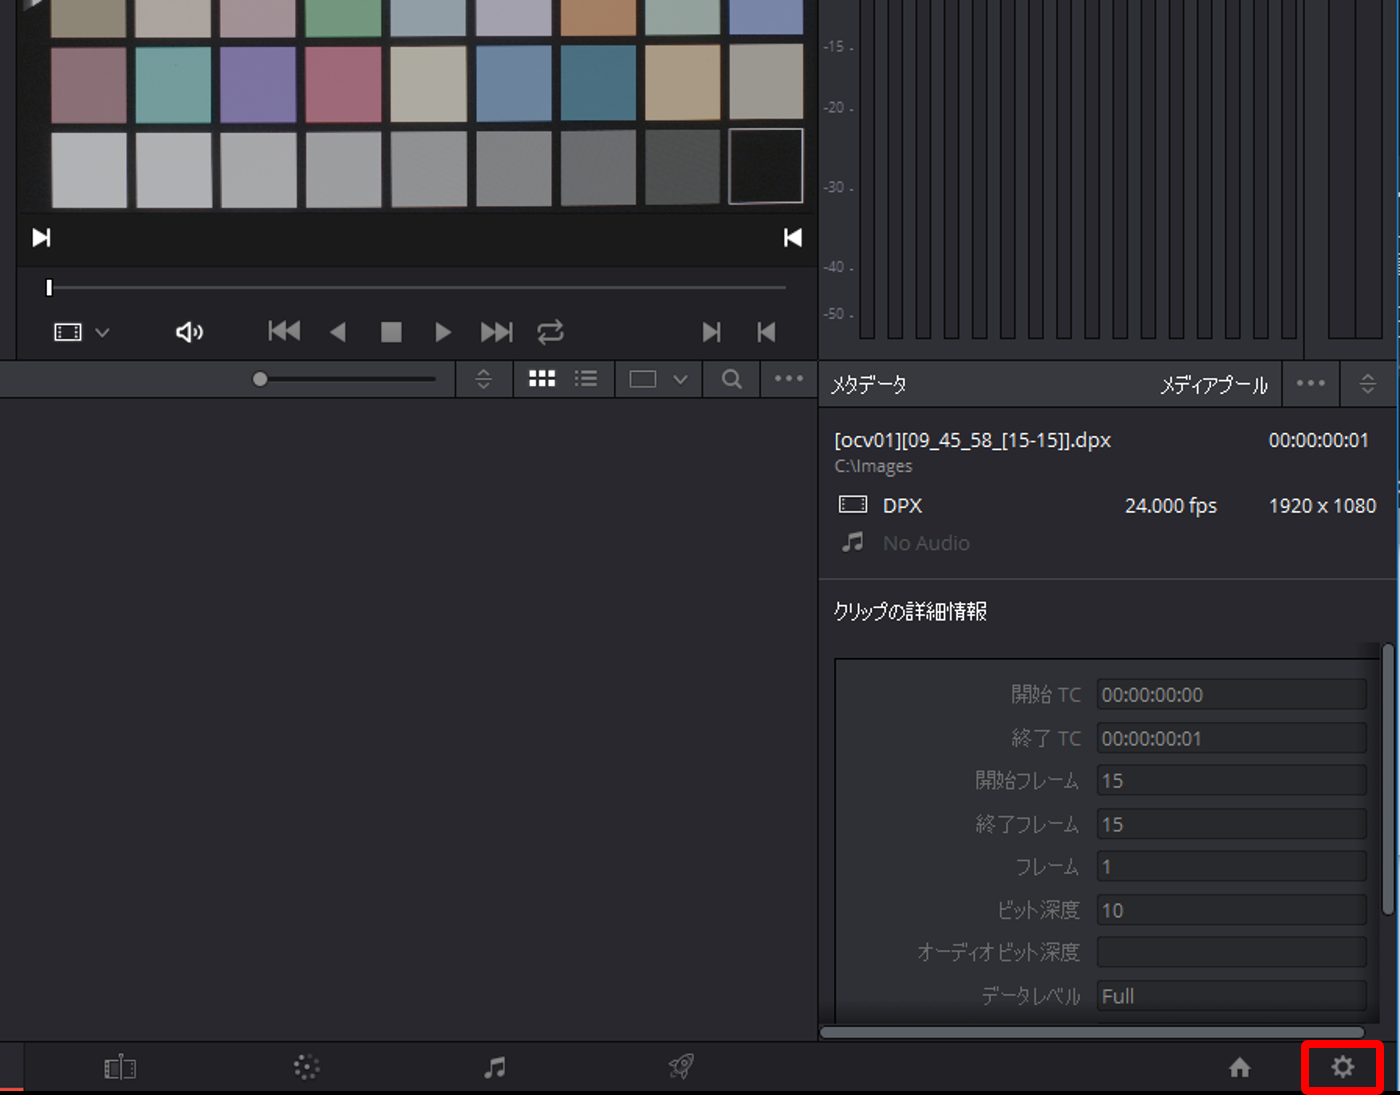
Open DaVinci Resolve and ingest camera recorded file into media pool. Select the file and click the right button of the mouse to open the menu.
Slect "Clip Property" on the menu to show setting screen.
Here you MUST select the data level. Please select "Full" not "Auto".
"Data Level" means do scaling or not, if you select "Video", DaVinci will scale down the 10bit date into 64 to 940 range.
The LUT we are going to use is designed to be applied to Full Data image, so if you select "Video", the result might be different as expected.
If you select "Auto", DaVinci might do scaling without noticing you to change the results.
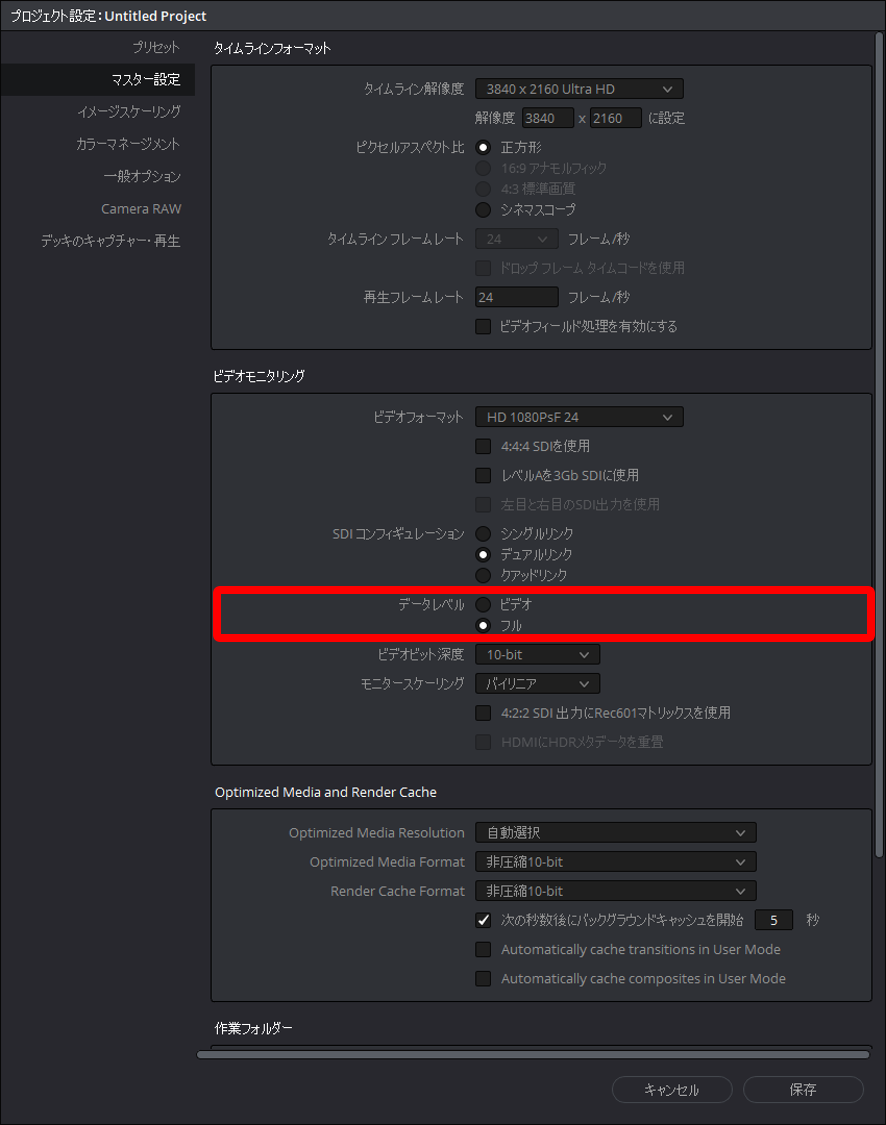
2. Setting of Video Output Range
Next, please click gear icon on the bottom-right of the screen to open project setting.
Select "Master Setting" on the left side bar and select "Full" for data level of Video Monitoring Setting.
In some cases, you want to use "Video" for this setting. You have to prepare suitable LUT for this setting when exporting LUT on WonderLookPro. You can create Full targeted LUT instead of Legal targeted LUT in such case.
Here, let's select "Full" to match shooting on-set.
3. Setting of 3DLUT Interpolation
Upto here, you finished minimum setting to match video output. Here is the setting for 3DLUT interpolation you should confirm.
Please selecte "Color Management" from the left side bar, and we recommend to set Tetrahedral. "Tetrahedral" or triangular interpolation is the method that WonderLookPro and IS-mini is using, and it brings less error and less banding artifact than usual cubic interpolation.
4. Output range for Delivery
Last setting is output range for delivery. If you are going to create rendered footage, you MUST check this setting.
You can access to the data level setting from detail setting in the bottom of render setting.
You can choose from "Video" or "Full", but to match the on-set result, you MUST select "Full" this time.
If you have to select "Video" for this, setting, you have to export LUT in deferent settings.