

Tone Curve Panels
Tone Curve Information Control
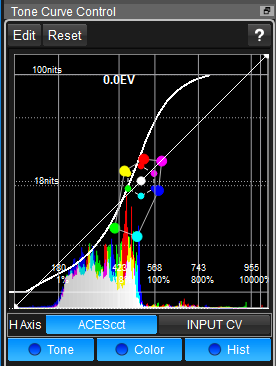
This area is to confirm the characteristics of the total rendering and control tone curve for color correction.
Bt double clicking the title bar, or by clicking the icon on the right side of the title bar, you can float this control and enlarge to use it.
 Selection of the horizontal axis
You can select the horizontal axis by the buttons just below of graph area.
You can choose "Grading Space" or "Input CV" for the viewing system tone and controling of the tone curve.
1.Set the grading space as the horizontal axis
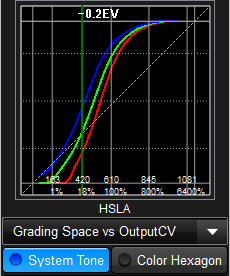
If you want to choose Grading Space as the horizontal axis, just click the left button, on which shows the name of the grading space.
Horizontal axis will be all the range of grading space. The straight line which has 45 degree slope is the default, which converts nothing.
Some of the grading spaces (HSLA, ACEScct) covers negative ACES values.
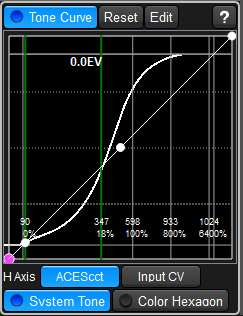
2.Set the input code value(CV) as the horizontal axis
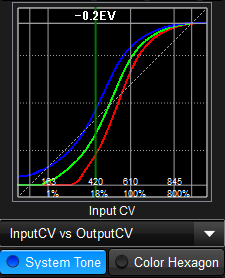
To select the Input CV, click the Input CV button on the right of red rectangle.
On this mode, the default tone curve will be shown as System Tone Curve. You can edit the system tone curve directly to control tone of the image.
It means, you can edit over all tone property to create proper tone curve transform on the grading space.
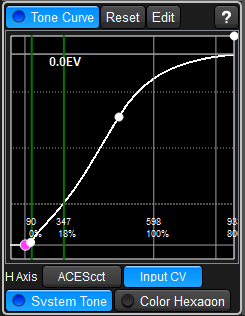
Left graph is the default tone curve on the horizontal axis of grading space. The tone is 45 degree slope straight line.
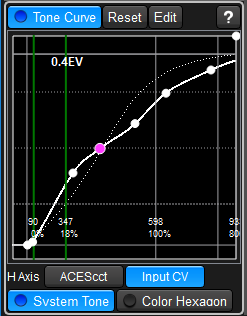
Center graph is on the horizontal axis of Input CV. You can find the control points of the tone curve on the system tone curve. It means you can control system tone directly to create proper tone cuve on the grading space.
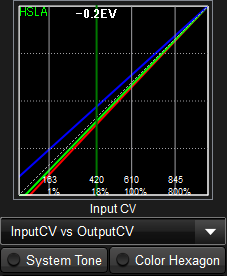
Right graph is the example of the edited tone curve on the horizontal axis of Input CV. Default system tone is shown in dot and you can easily confirm how much you changed from the starting point.
On the center and right graph, the left side control point is not on the origin of the graph.
It is caused by the offset value of grading space, when converted to input code value.
To move the points
To move the point, please move mouse cursor around the point, and push the mouse button when the cursor change to cross and drag whereever you want.
Creation of points
You can create points upto 32. To create a new point, please move the mouse cursor on the tone curve and click where the cursor turned to cross.
Delete of the point
To delete the point, please move the mouse cursor around the point, and double click the mouse when the cursor turned into cross.
System Tone Curve
By clicking "System Tone" button, you can change the state of showing "System Tone Curve". If the system curve is not shown, ASC-CDL parameter's calcurated curve.
System ToneCuveHolizontal Axis is Grading Space |
System ToneCuveHolizontal Axis is Code Value |
Showing ASC-CDL CurveHolizontal Axis is always grading space |
|
|
|
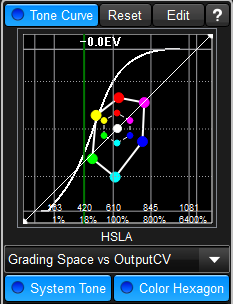
Color Hexagon
As well as System Tone Curve, you can show and off the "Color Hexagon". "Color Hexagon" is to show the color rendering characteristics by showing 6 represented color rendered result. Here is the example of showing color hexagon.
Edit Menu
Edit button triggers to show following menu.
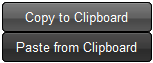
Menu |
function |
Copy To Clipboad |
Copy current tone curve parameters to clipboard which can be pasted on excel sheet. |
Paste from Clipboard |
Paste tone curve information in the clipboard. You have to copy the clipboard first and after edited the parameter, copy the editted parameters to the clip board before calling this function. |
Explanation about the other captions

①Grading Space
It shows current grading space name.
②Equivalent exposure shift of total color correction
It shows the amount of color correction by the exposure shift value at 18% gray. When it shows "+2.0EV", it means the total color correction brightens image at 18%gray point about 2 steps. It is available when you are using presetLUTs.
③Scene Brightness expression in holizontal axis
It shows the brightness of the scene in percent scale and 10 bit code value(CV).